A Helicopter lead setup is a great arrangement for reducing the likelihood of tangles on the cast. It is also, when used with a fixed lead, a safe arrangement should a breakage occur. Our Gravit8™ Leader is the perfect material for this setup being incredibly supple, dense, easy to splice and because of its diameter, carp friendly.

What you'll need to construct a helicopter leader:
A spool of Gravit8™ Lead free leader, a speed link or Q ring which your lead will attach to, Helicopter buffer bead, a size 11 QC or standard flexi ring swivel, Silicone leader tubing and a standard or Tungsten 6mm Tapered bore bead
Tools for the job:
Scissors, Knot puller and fine splicing needle.
STEP ONE: Cut a length of Gravit8™ Lead free leader material, Three foot is a good starting point. At one end fold over around 2 - 2.5 Inches. This will be the length of our splice.


STEP TWO: Compress the main length of leader at the point at which the folded section ends, this will open up the weave and increase the ease with which it can be spliced. keeping it perpendicular to the leader insert the splicing needle and gently work it through the inside until it reaches the fold line, now poke the needle back through to the outside.


STEP THREE: Slip a Speed link or Q ring onto the leader then trap the cut end in the gate latch of the splicing needle. With the latch closed retract the needle through the leader, using your index finger and thumb to manipulate the splice at the point the loop is formed will help to get it moving.


STEP FOUR: Once the the needle is back out, pull on the cut end until the loop is closed up tightly against the speed link. If needs be trim a little off the end then work the outer section of the splice over the inner section. once the tag end dissapears inside the leader give the splice a good pull with a knot puller tool to compress the splice.


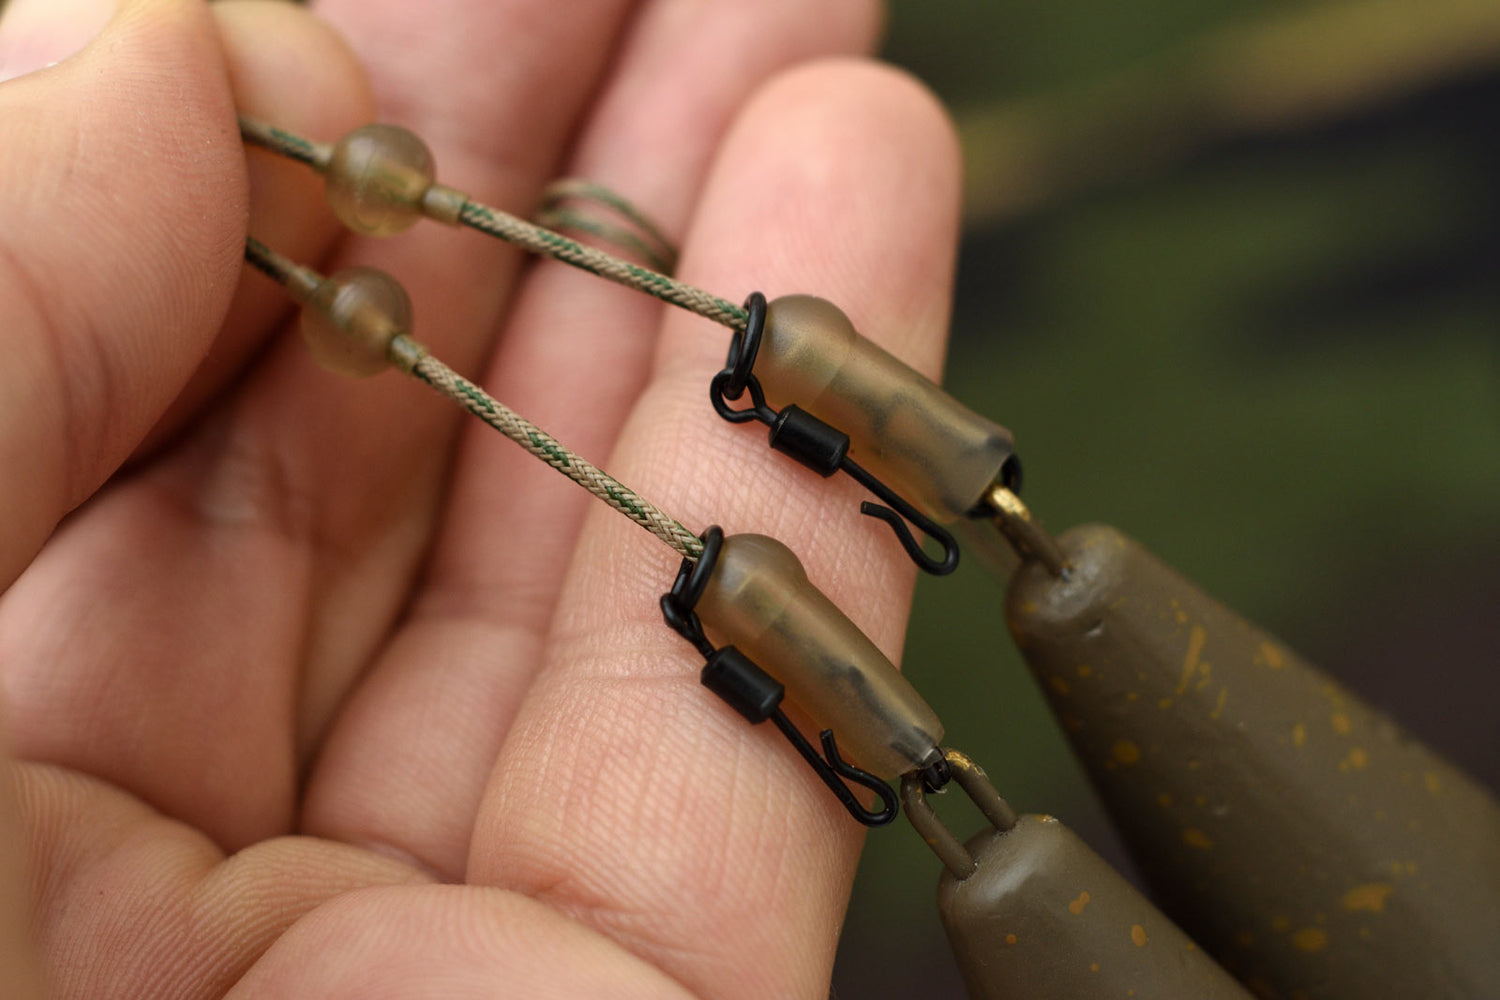
STEP FIVE: At the other end of the leader slip a Heli buffer bead on and slide it all the way down to the speed link. Do the same with a size 11 Quick change Heli ring swivel or Flexi ring swivel (whichever you'd prefer to attach your rig to later).


STEP SIX: Now cut a small length of our ultra grippy Silicone Leader tubing, around 10 to 12mm will be ideal. Work it onto the splicing needle and then transfer it onto the leader and down towards to speed link.


STEP SEVEN: Take one of our 6mm Tapered bore beads, if you really want to pin down yor rig use the Tungsten variant. Now thread it onto the leader, note for fish safety it's important that the smaller hole is first with the larger hole following. Slide it down and locate it upon the section of Silicone tubing. Twisting the bead will help.


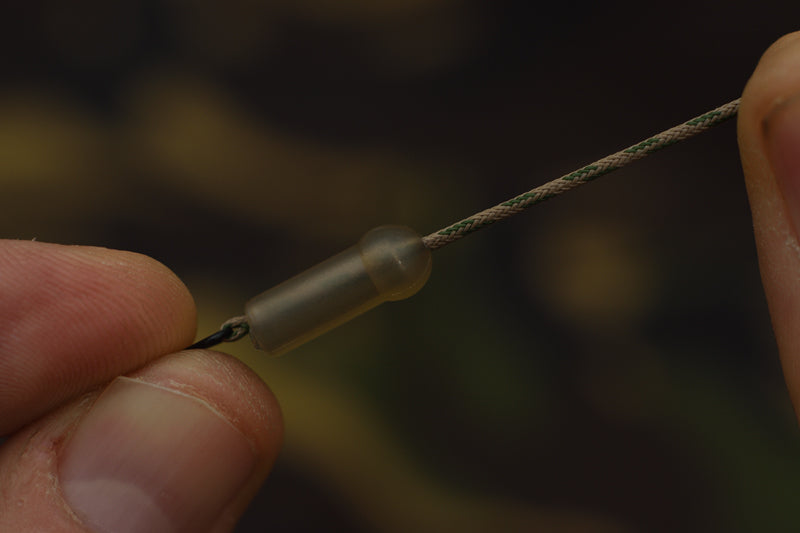
STEP EIGHT: Now at the opposite end of the leader create another splice following the same steps detailed at the beginning of the how to, but without a speed link. When bedding down the splice insert something into the loop to prevent it closing up. A knot puller is perfect for this.


NOTES: Position your silicone tubing and bead at a distance from the lead that is sufficient for your rig to settle on top of Silt or low lying weed, this could be anything from a couple of inches to a foot or more for deeper silt. Ensure that your bore bead can pass over the knot connecting your leader to mainline, this will be correct if you've threaded the bead on as detailed above.
RIG CHOICE: Because of the nature of the helicopter set up most rigs can be used with it. Rigs that utilise Semi stiff or Stiff hook link like our Revolve™ bristle filament are well suited to the helicopter with Hinged stiff rigs, Chod rigs, Ronnie and German rigs all being suitable choices.


