The reverse combi rig is a fantastic alternative to the Hinged stiff rig. Many anglers are looking for a subtle low sitting pop up rig hence the current popularity of the Ronnie rig. The reverse combi rig performs similarly to both the Hinged stiff rig and Ronnie rig but has the ability to be tied with very short end sections which has be presented very close to the lakebed if so desired.
What you'll need to tie the Reverse Combi rig:
Some of our REVOLVE™ Stiff rig filament, a coated braid, One of Our Duropoint® Chod or Curve shank hooks along with one of our Bait attachments, We'll be using a Micro hook ring swivel but you can also use a rig ring screw or Rig ring.
Tools for the job:
Scissors, Knot puller x 2 and a lighter.
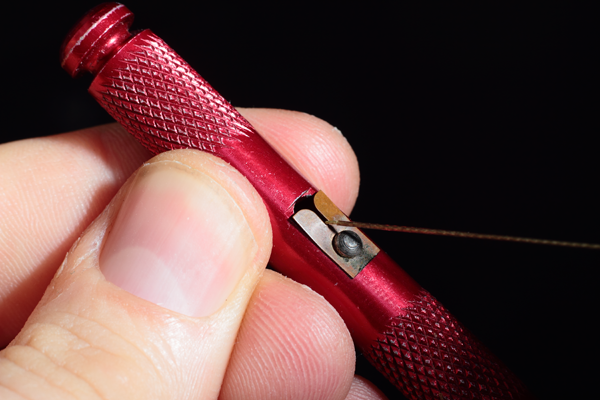
STEP ONE: Take a 7 inch length of bristle filament & one of our Chod hooks, a Size 5 is perfect for 14/15mm popups pass the bristle filament through the eye so that there is around 40mm at the back of the hook.


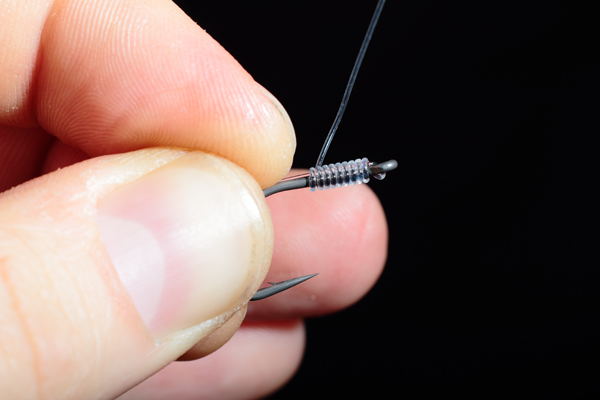
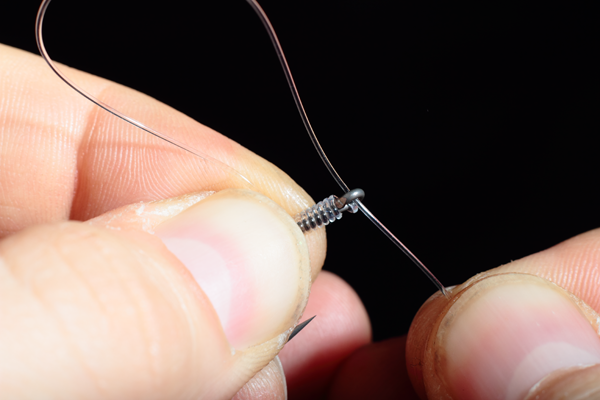
STEP TWO: Clamping the 40mm length of B/F along the back edge of the shank of the hook with your Left hand( if you're right handed) use your right hand to start whipping the B/F up the shank of the hook going anti clockwise.
STEP THREE: For a Size 5 hook we recommend whipping up the shank around 8 or 9 times, For a size 6 hook, 7 or 8 and for a size 8 hook 6 or 7 times
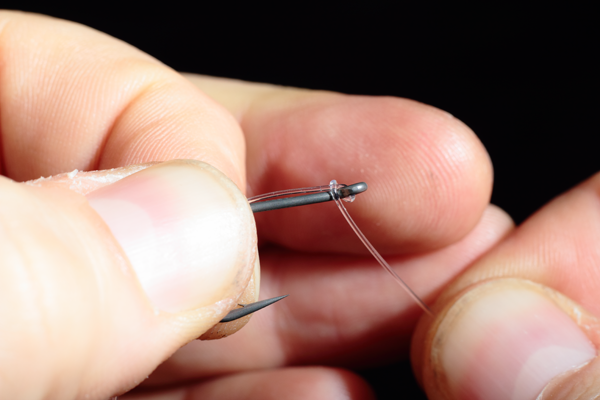
STEP FOUR: Carefully adjust your grip to pinch the whipping you have just completed to prevent it unravelling. Now pass the long length of Bristle filament through the eye from back to front. Pull it all the way through then use your knot puller tool to tighten
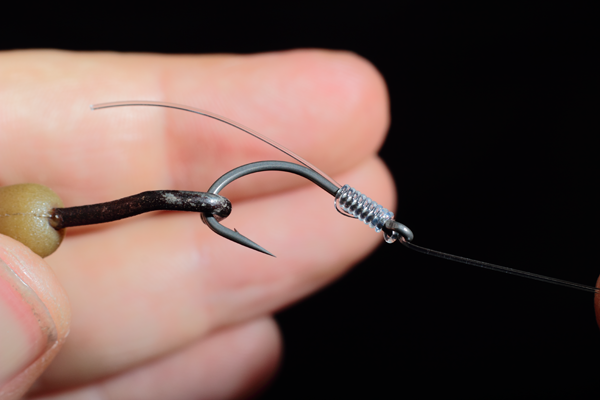
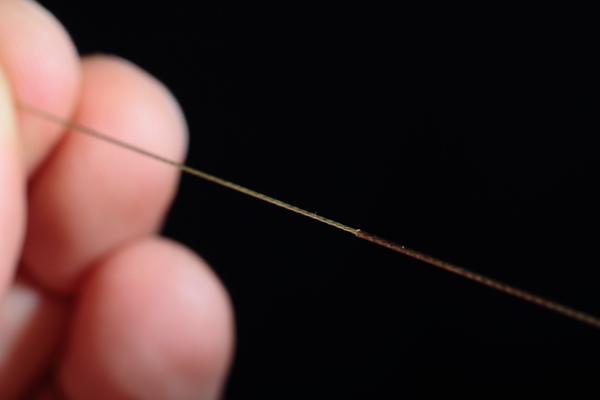
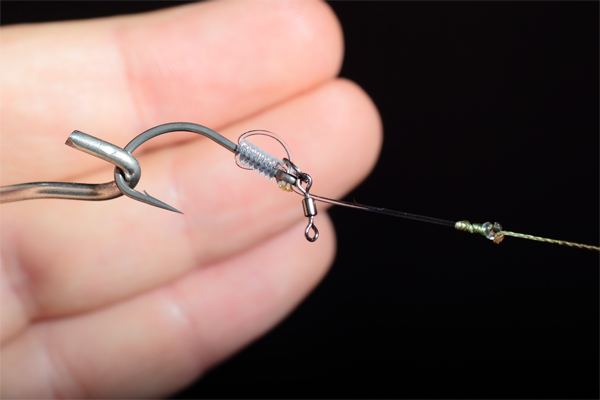
STEP FIVE: Thread the Micro hook ring swivel onto the line at the back of the hook
STEP SIX: Now take the end of the line onto which you have just slid the micro hook ring swivel and pass it back through the eye from back to front. Pull it right the way through so that the "D" Is closed right up then trim the line where it exits the eye to about 5mm long.
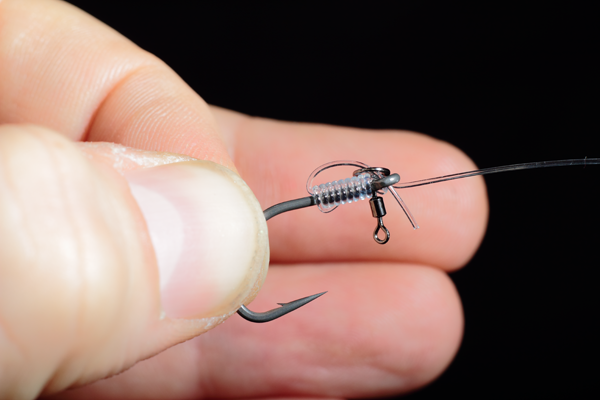
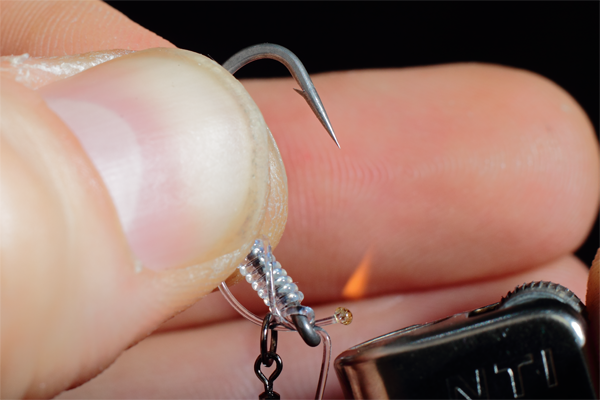
STEP SEVEN: Using your lighter carefully light the tag end that you have just created and flatten it with your thumb before it reaches the eye of the hook, it may help to bend the rest of the line out of the way before you do so. With this done grab the micro ring swivel and use it to pull to "D" into shape.
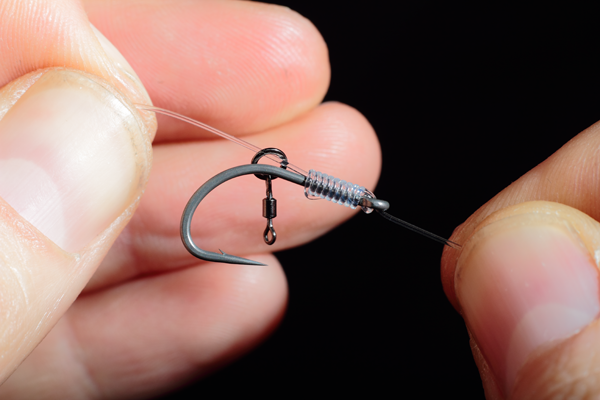
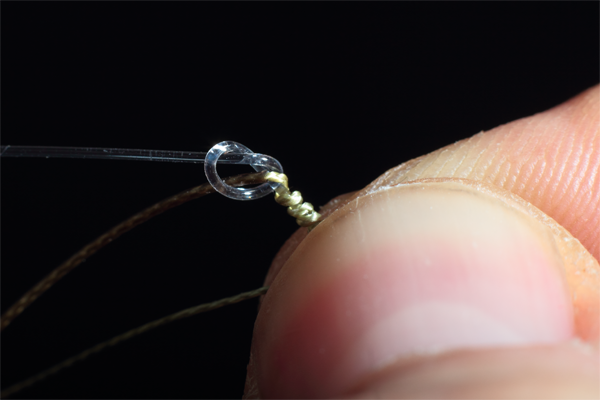
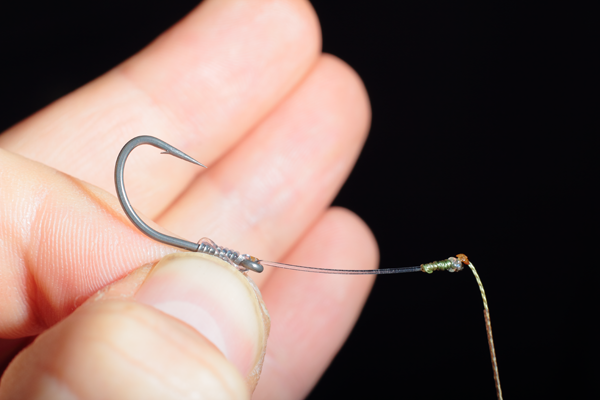
STEP EIGHT: Now create a simple overhand loop in the bristle filament
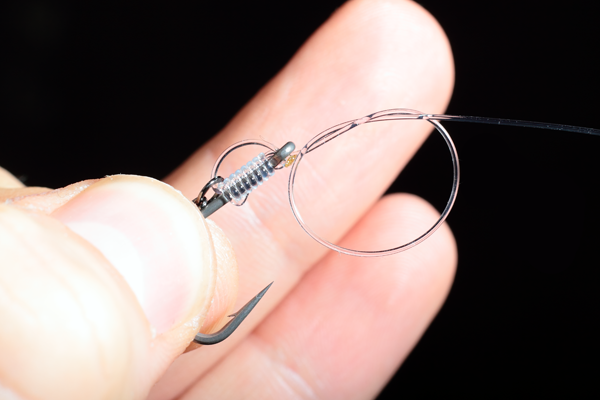
STEP NINE: Tease down your overhand loop until it is almost but not completely closed up. The position of the overhand loop in relation to the hook will determine the height at which your pop up will sit above the lakebed. If you're after a really low sitting pop up rig then aim to get the overhand loop around 10mm from the eye of the hook. In our example the knot is around 35mm from the eye.
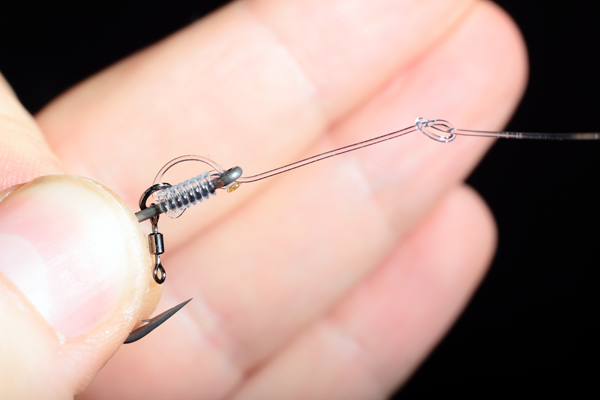
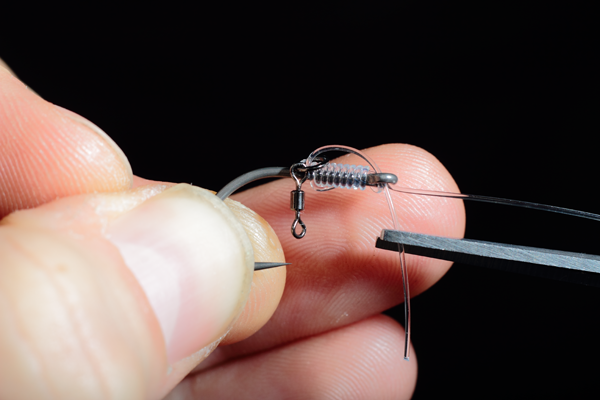
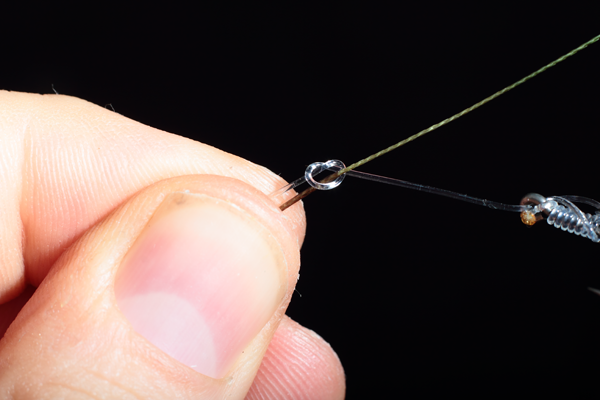
STEP TEN: Now take your length of coated braid and using your coated braid stripper tool remove around 60mm of coating from one end.
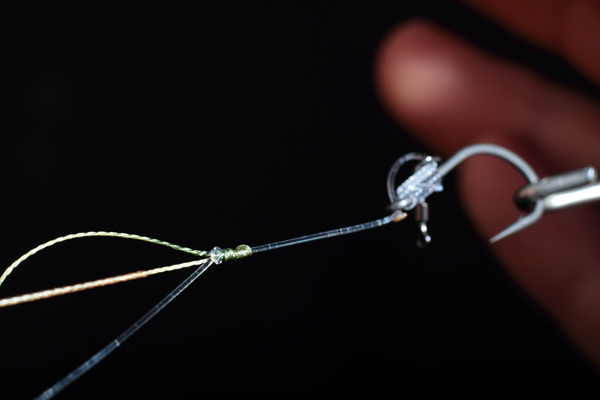
STEP ELEVEN: Now holding the hook section you made earlier in your right hand(assuming you're right handed) feed the stripped end of the coated braid through the overhand loop you created in the bristle filament. It is important to note the braid should go through the loop the same way the Bristle filament exits the loop(see below) it is also important to note that the entire section of bare braid has gone through the loop plus a couple of millimetres of the coated braid too.
STEP TWELVE: Holding both the bristle filament and coated braid securely just behind the loop with your left hand now you're going to whip the bare braid up the bristle filament towards the hook six or seven times with the right hand. We're trying to keep the whipping quite close together like so
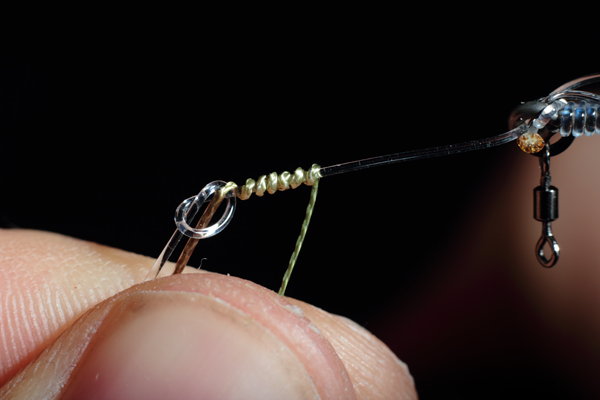
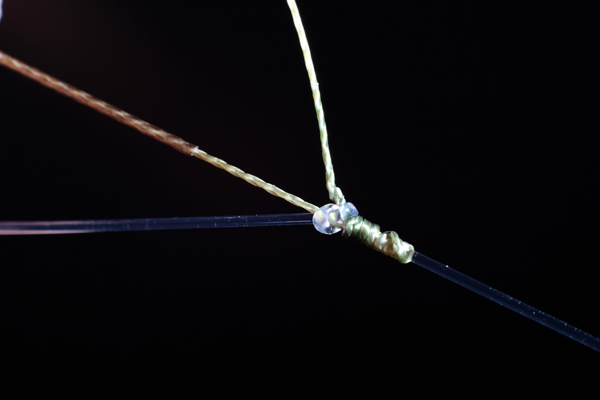
STEP THIRTEEN: With the six whips up the bristle filament complete its time to whip back down over the top of these a couple of times towards the overhand loop and then through the overhand loop the same way as the coated braid and bristle filament. This is easiest if you pinch the uppermost whip and bristle filament between the thumb and forefinger of your right hand as below.
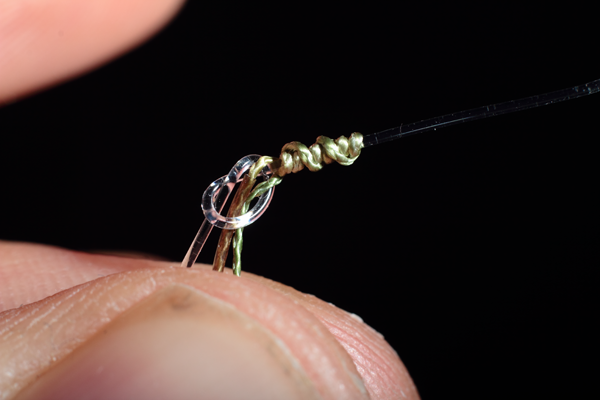
STEP FOURTEEN: Now put your hook on the Knot puller tool and grab the other end of the bristle filament with a pair of pliers and pull until the Overhand loop is completely closed up tight.
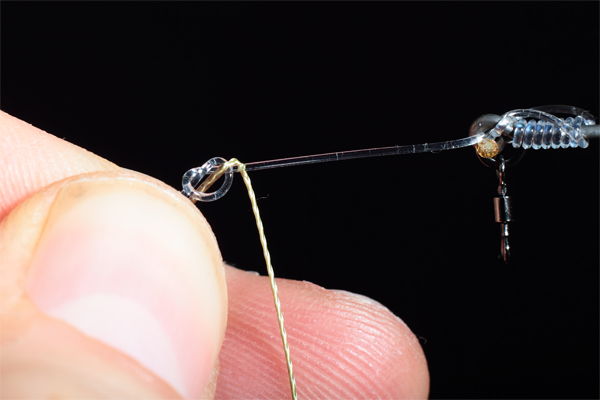
STEP FIFTEEN: Keeping the hook on the knot puller tool now it's time to tighten up the whipping. Take the long length of coated braid in your left hand and pull, the Mahin knot will start to tighten up. Its done once it cannot be tightened any further and has a conical shape.
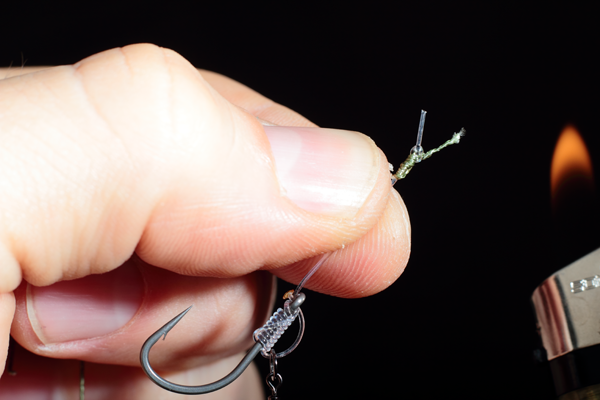
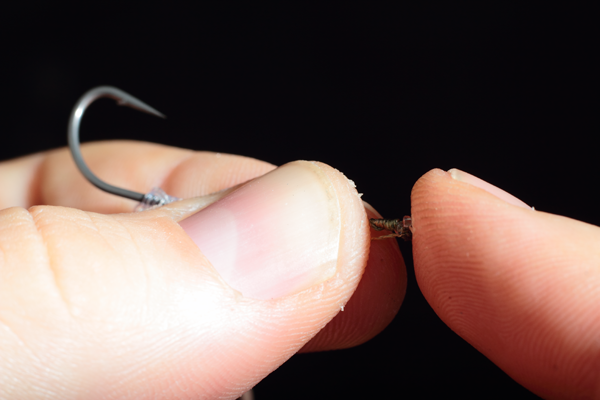
STEP SIXTEEN: Trim the tag ends of the mahin Knot. Now fold the long coated braid out of the way and carefully use a lighter to blob both tag ends and extinguish with a wetted finger.
STEP SEVENTEEN: Now steam the bristle filament into the desired curve, we like a very slight curve on our reverse combi rigs.
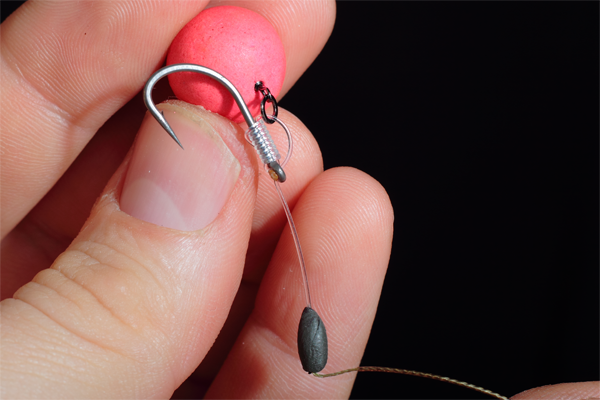
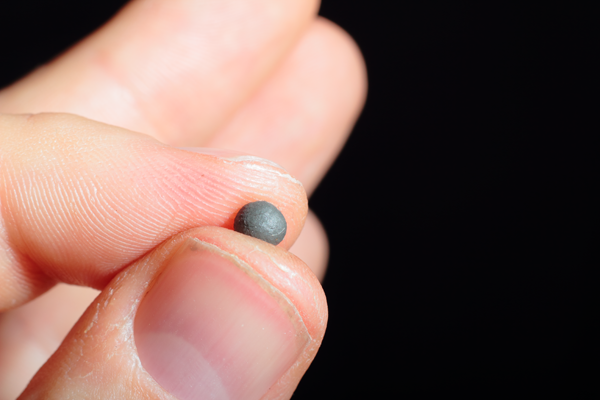
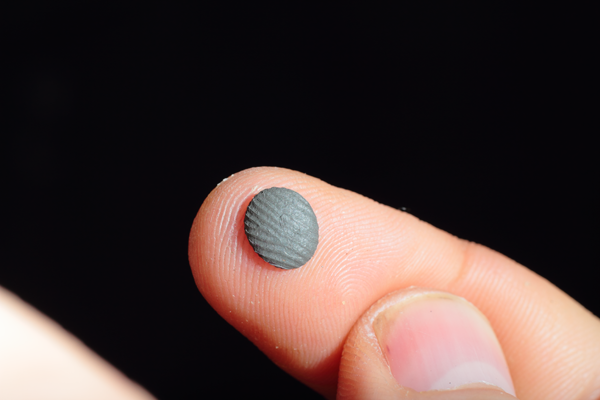
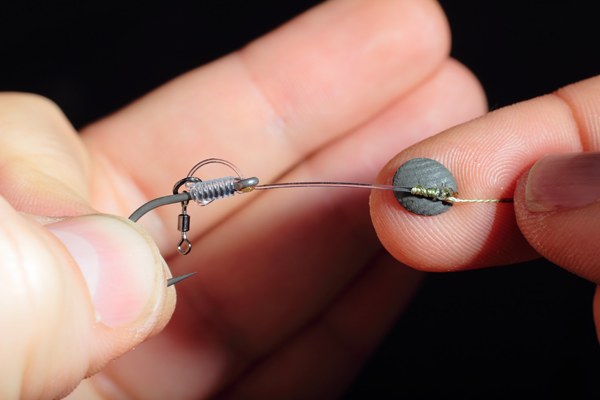
STEP EIGHTEEN: Take the required amount of tungsten putty, roll it into a ball before flattening between your thumb and forefinger like so.
STEP NINETEEN: Take your rig and push the Mahin knot into the flattened Tungsten putty before moulding the putty into a pear shape around the knot like so.

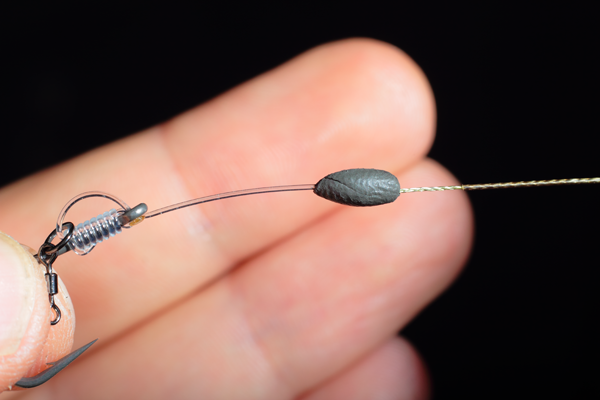
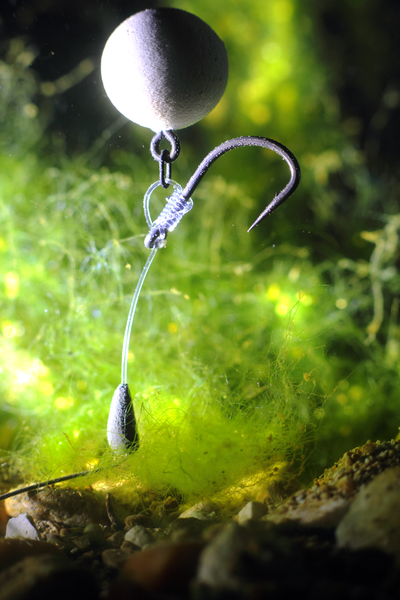
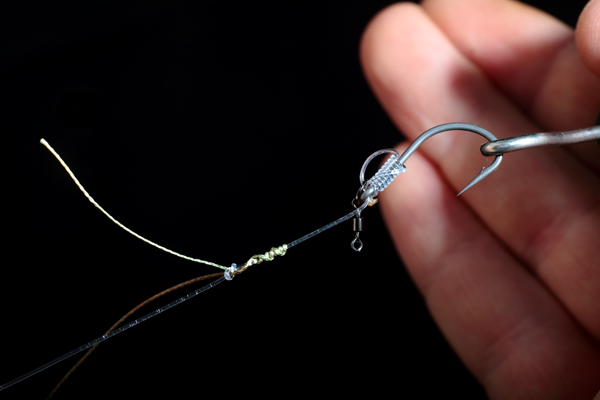
STEP TWENTY: Job done, all that's left to do is to attach your rig to the appropriate swivel for the lead arrangement you'll be using and add your hookbait as below.
