What hasn't been said about the Chod rig, isn't worth mentioning. Used in the right situation it is an incredibly effective rig. When bites are hard to come by a rig that can be cast a long way and which is very unlikely to tangle can be a real benefit. A great method for presenting a single hookbait at distance or over a spread of boilie. Here we show our way of tying them.
What you'll need to tie the Chod rig:
A spool of REVOLVE™ Stiff rig bristle filament, Duropoint® Chod hooks along with one of our Bait attachments, We'll be using a Micro hook ring swivel but you can also use a hook ring swivel screw, rig ring screw or Rig ring.
Tools for the job:
Scissors, Knot puller x 2 and a lighter.
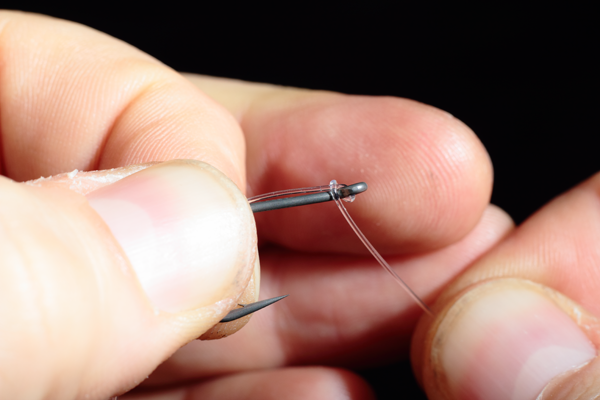
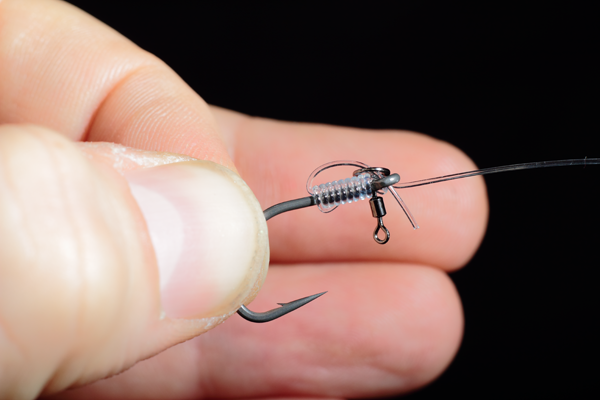
STEP ONE: Take a 7 inch length of bristle filament & one of our Chod hooks, a Size 5 is perfect for 14/15mm popups pass the bristle filament through the eye so that there is around 40mm at the back of the hook.


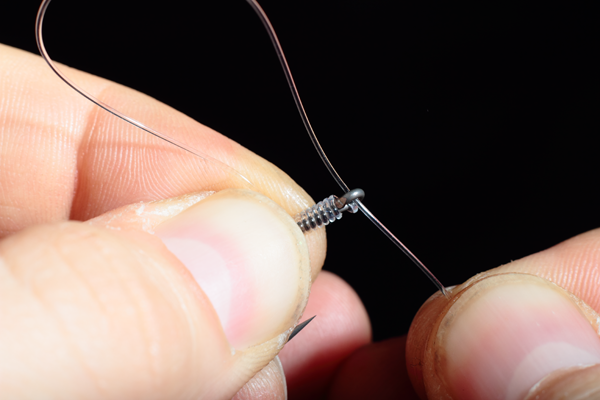
STEP TWO: Clamping the 40mm length of B/F along the back edge of the shank of the hook with your Left hand( if you're right handed) use your right hand to start whipping the B/F up the shank of the hook going anti clockwise.
STEP THREE: For a Size 5 hook we recommend whipping up the shank around 8 or 9 times, For a size 6 hook, 7 or 8 and for a size 8 hook 6 or 7 times
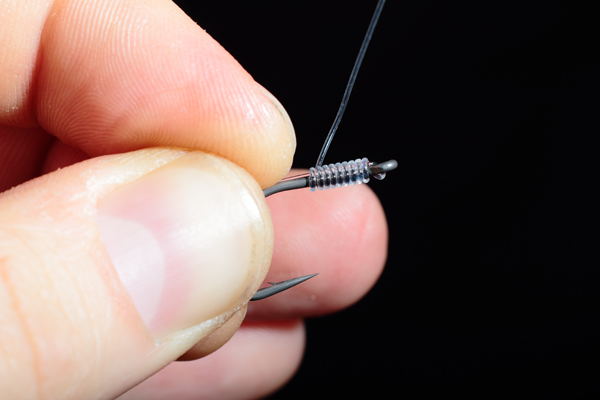
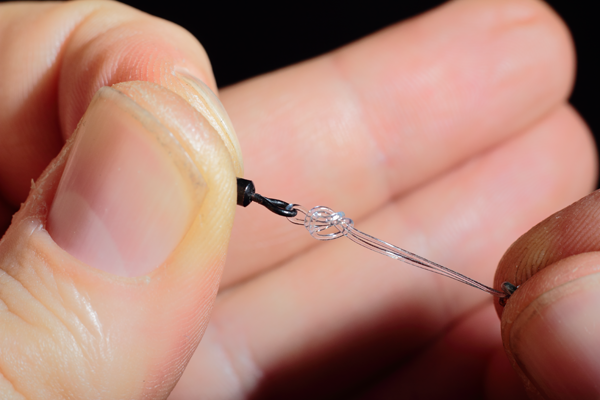
STEP FOUR: Carefully adjust your grip to pinch the whipping you have just completed to prevent it unravelling. Now pass the long length of Bristle filament through the eye from back to front. Pull it all the way through then use your knot puller tool to tighten
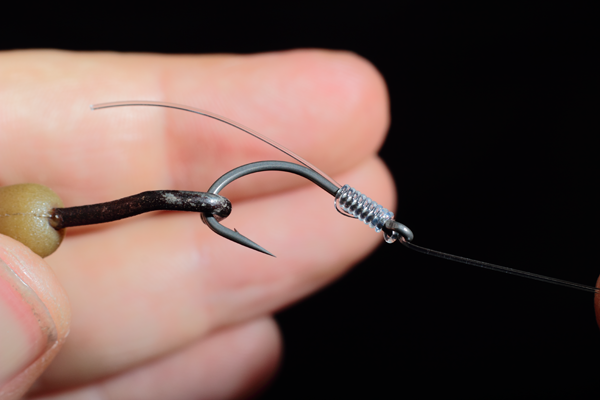
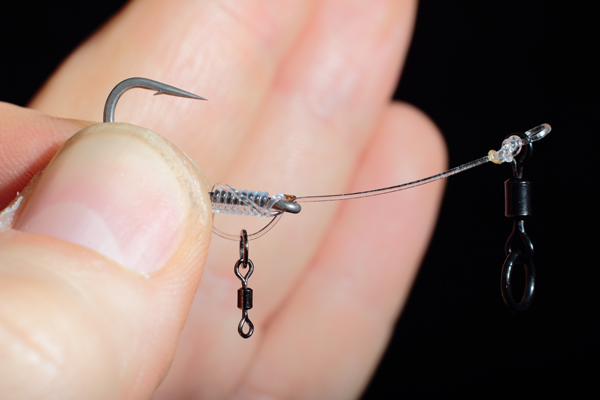
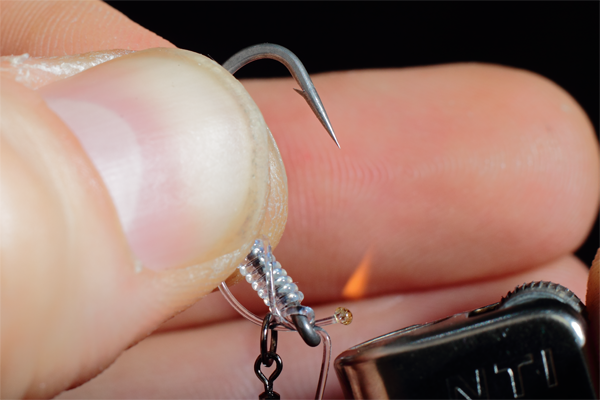
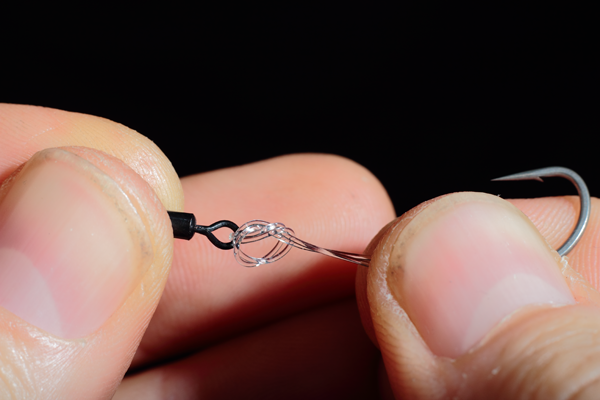
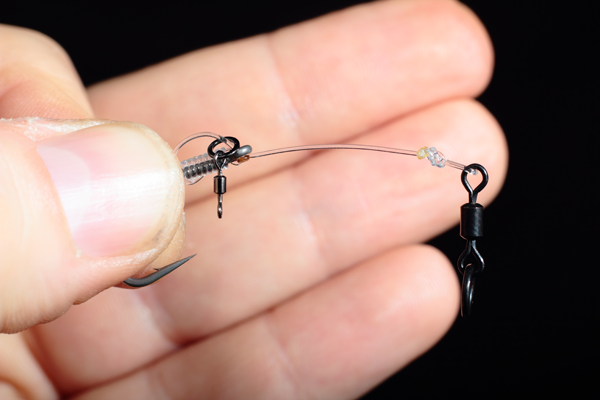
STEP FIVE: Thread the Micro hook ring swivel onto the line at the back of the hook
STEP SIX: Now take the end of the line onto which you have just slid the micro hook ring swivel and pass it back through the eye from back to front. Pull it right the way through so that the "D" Is closed right up then trim the line where it exits the eye to about 5mm long.
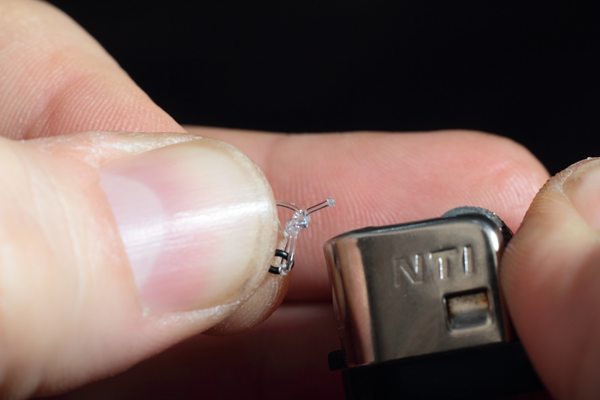
STEP SEVEN: Using your lighter carefully light the tag end that you have just created and flatten it with your thumb before it reaches the eye of the hook, it may help to bend the rest of the line out of the way before you do so. With this done grab the micro ring swivel and use it to pull to "D" into shape.
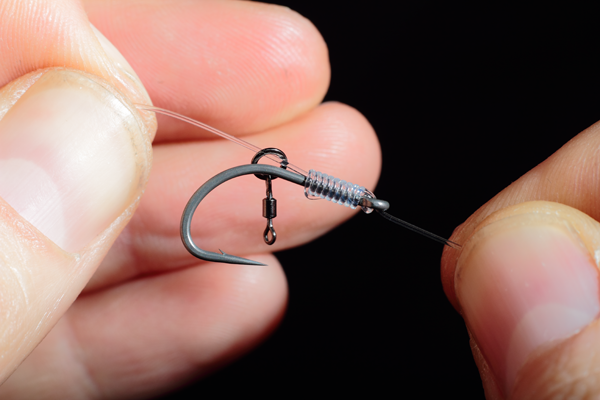
STEP EIGHT: Take the remaining length of bristle filament and double it over, we're looking for the fold to be around 35mm from the eye for a short Chod rig and 45mm for a longer one.

STEP NINE: Pass one of our Size 11 ring swivels onto the bristle filament and down to the fold you have just created.
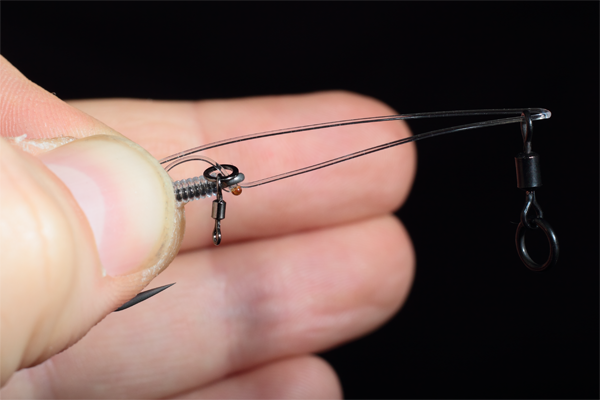
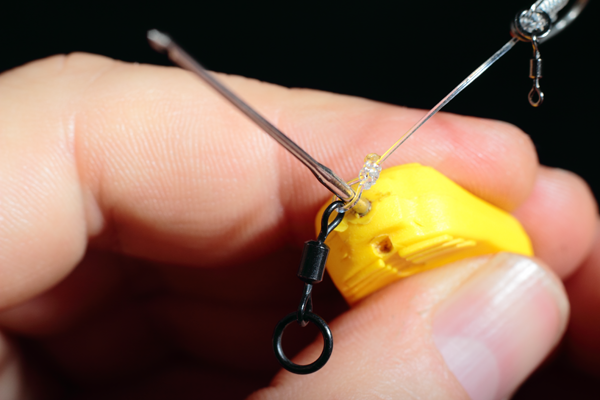
STEP TEN: Now we're going to create an overhand loop, Hold the hook and hooklink with your right hand and form a loop in the doubled over hooklink. Now pass the ring swivel through the loop.
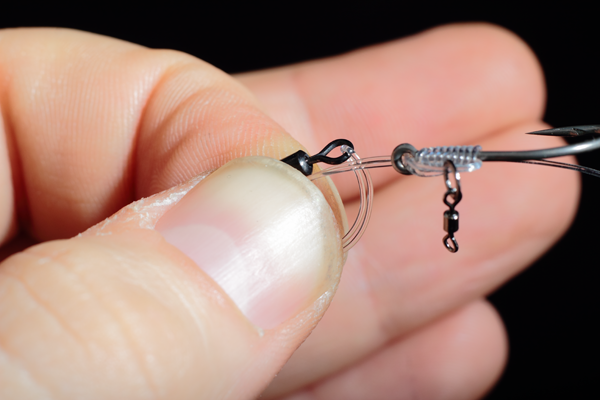
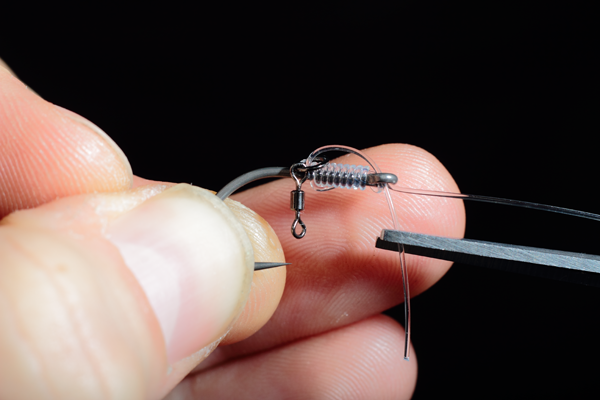
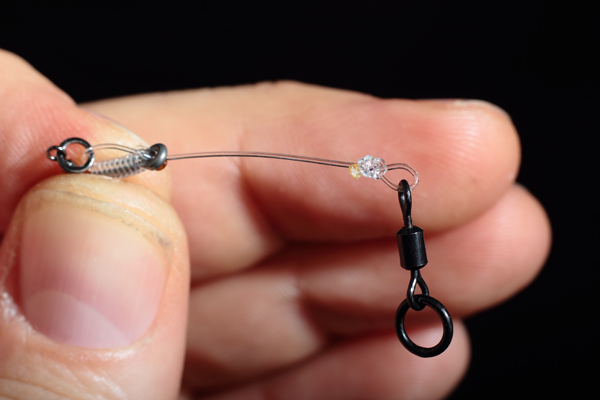
STEP ELEVEN: Tease the knot down until it is close to the swivel before tightening it down with two knot pullers, again whilst trying to ensure the loop stays fairly small.
STEP TWELVE: Trim the tag end down to about 5/6mm. Bend the bristle filament out of the way and carefully blob the tag end with your lighter.
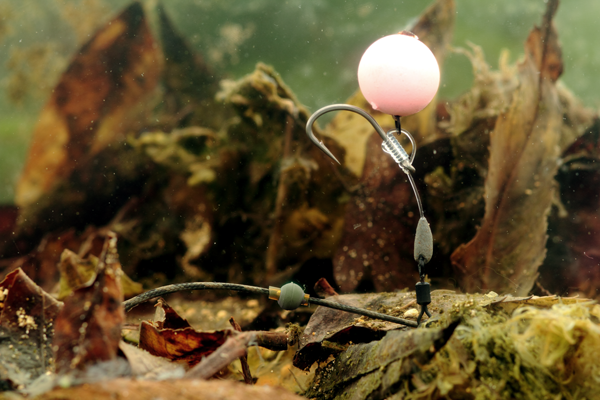
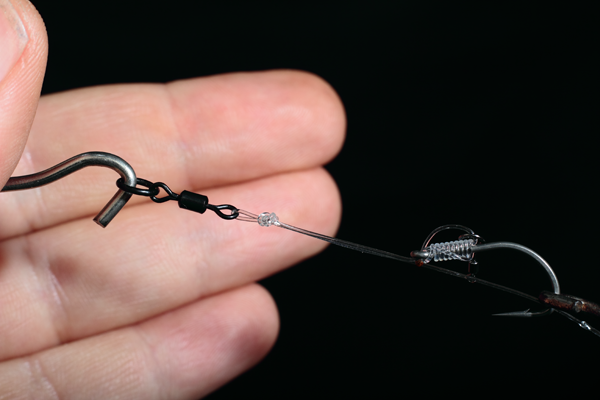
STEP THIRTEEN: Now steam your Chod rig into shape or form it between your thumb and fingers. We're looking to create a slight curve like the one pictured below.
STEP FOURTEEN: Your Chod rig is almost finished, but one little adjustment to make an improvement to the way the rig perfoms, We want to open up to loop attaching the rig to the swivel, this attention to detail makes the rig perform much more effectively by allowing extra movement.
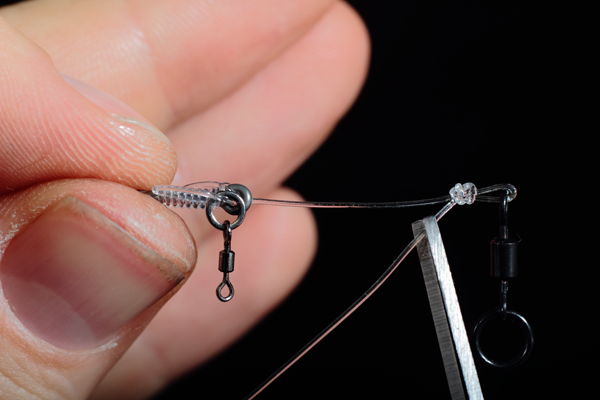
Side note: Many anglers like to use rig putty over the swivel and the knot where we have created the loop, this does work however in our opinion this restricts the Chod rig from working as well as is possible, it can also make the rig sit awkwardly. We much prefer to use the weight of the leader and or beads to counter the buoyancy of the Popup, If using a naked chod rig, then make the rig sink slowly by using a smaller popup or perhaps a size 8 ring swivel instead of a size 11. What we want to achieve is a Chod rig that sinks very slowly and comes to rest lightly over any weed or debris on the lakebed.
If you're short of time we supply ready tied Chod rigs - Hand tied in the UK to the highest standard you're likely to find. Click here to buy some
