
There isn't a carp that swims that can resist the almighty allure of a big juicy Tiger nut!
As the spring rolls in those big old carp will begin moving into the margins with more and more frequency. theres no better way to elicit a bite in the edge than with a meticulously laid trap and a handful of Chuffa's.
A tiger Critically balanced with a slither of brightly coloured Zig Foam Is a deadly effective hookbait, not only does it offer something visual to home in on it also helps the bait to fly back into the mouth when inhaled by a big carp.
When fishing in close, Don't be afraid to use a big hook, the tigernut will be fluttering above helping to conceal it! A big hook is much more likely to grab hold and the thicker gauge steel will be beneficial in stopping a Big carp hooked just yards away in its bid for freedom.
What you'll need to tie our balanced tigernut rig:
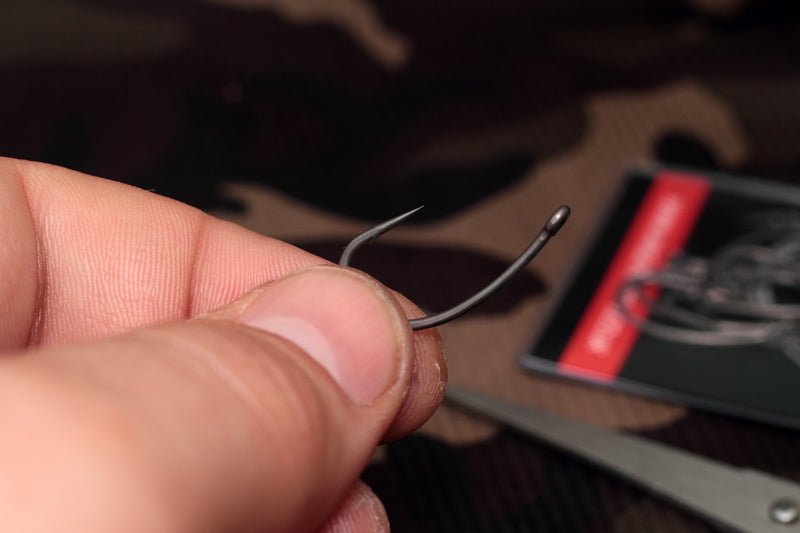
Some supple braid, One of our Duropoint Curve shank hooks(we're using a size 4) along with one of our bait attachments, we'll be using a mini rig swivel but you can also use a micro hook rig swivel. You'll also need some of our shank stops, 6mm STICKUMUP zig foam and our 3:1 trans Khaki shrink tube or Large line aligners.
Tools for the job:
Scissors, Knot puller, lighter and a tub of water for balancing.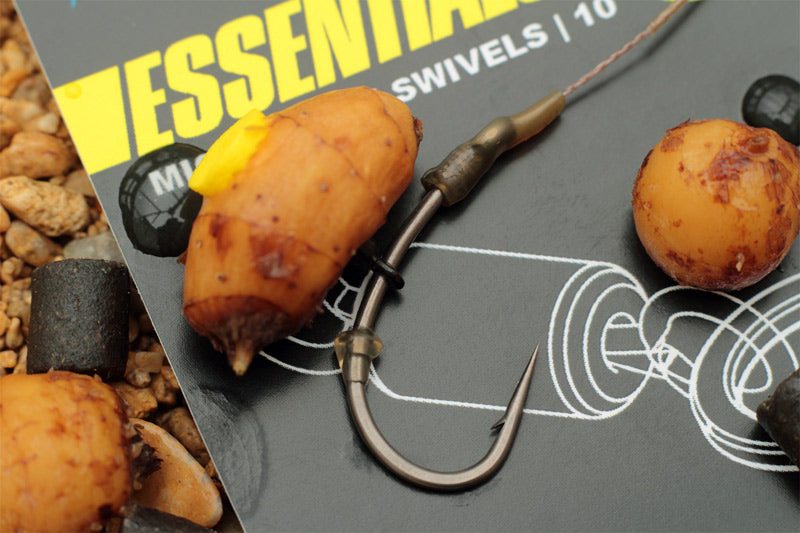
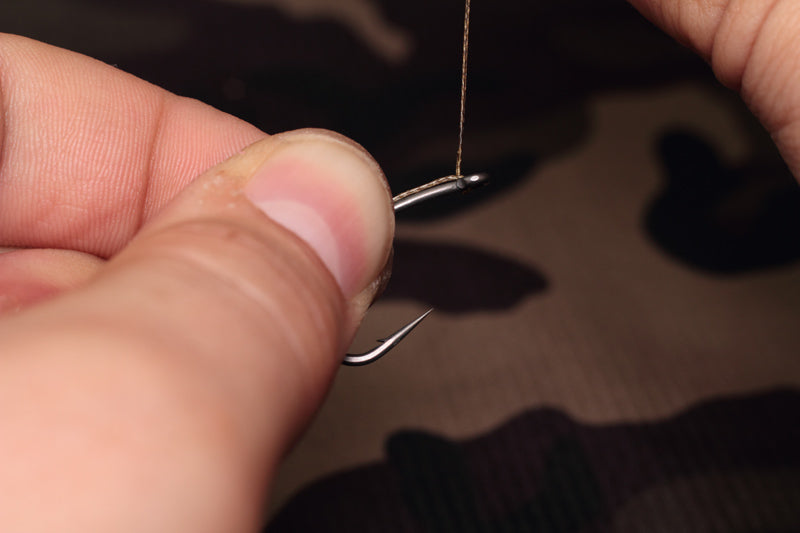
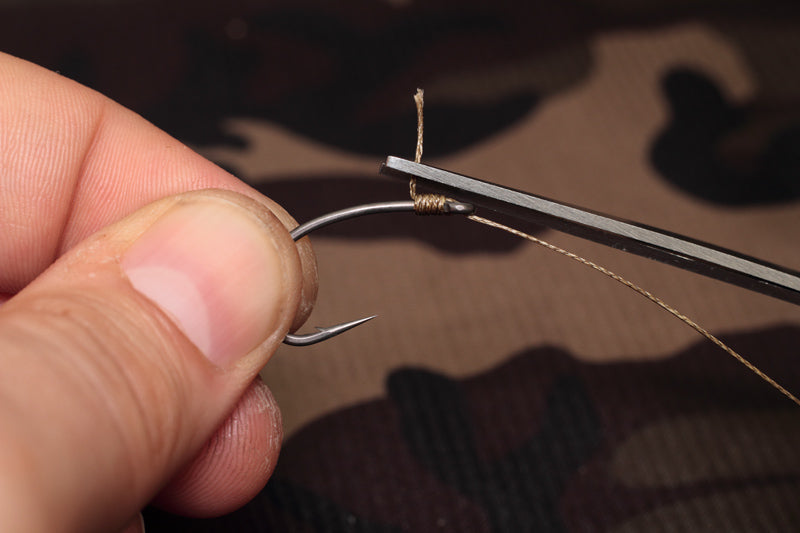
STEP ONE: Cut a 7 inch length of your chosen supple braid and feed one end through the eye of the hook, about half an inch will suffice.
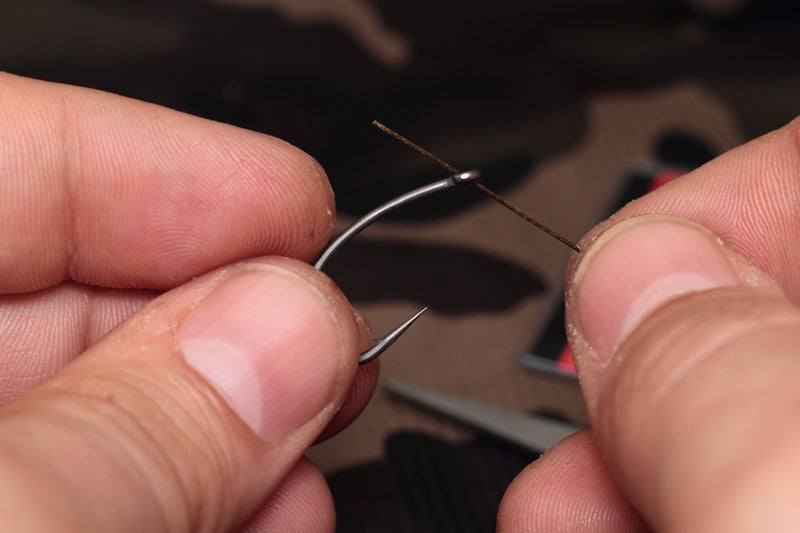
STEP TWO: Using your thumb and forefinger trap the braid against the shank of the hook then whip up the shank around five or six turns.
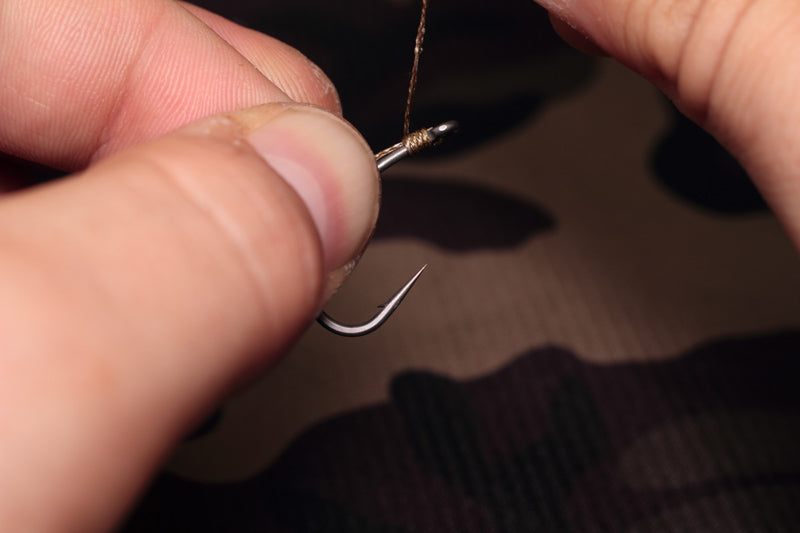
STEP THREE: Feed the hooklink back through the eye and tighten down the knot.
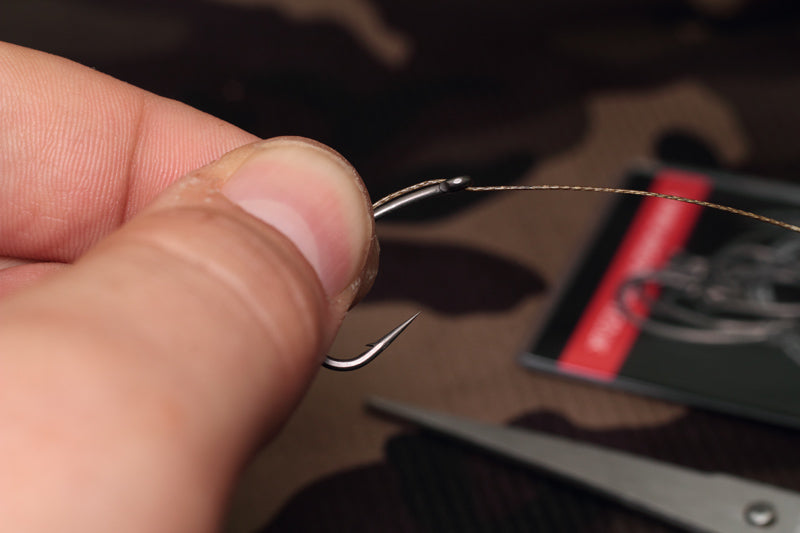
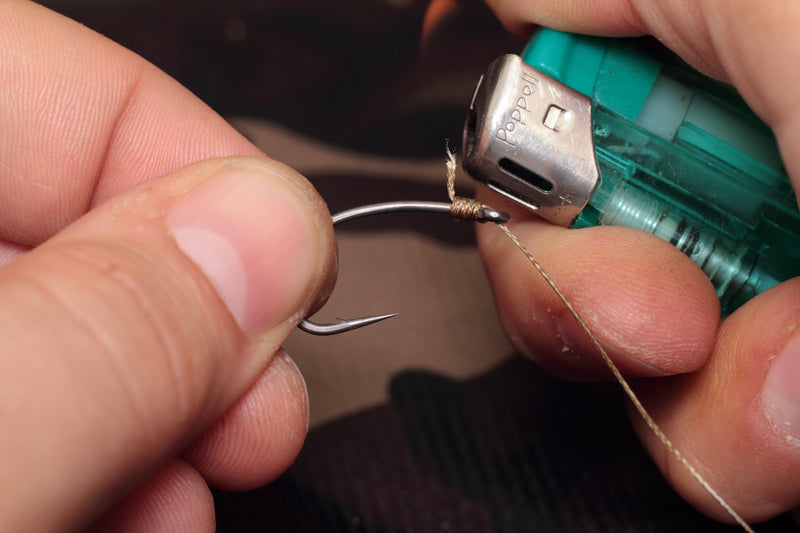
STEP FOUR: Trim the tag end, then using your lighter carefully melt the remainder and blob it against the shank of the hook.
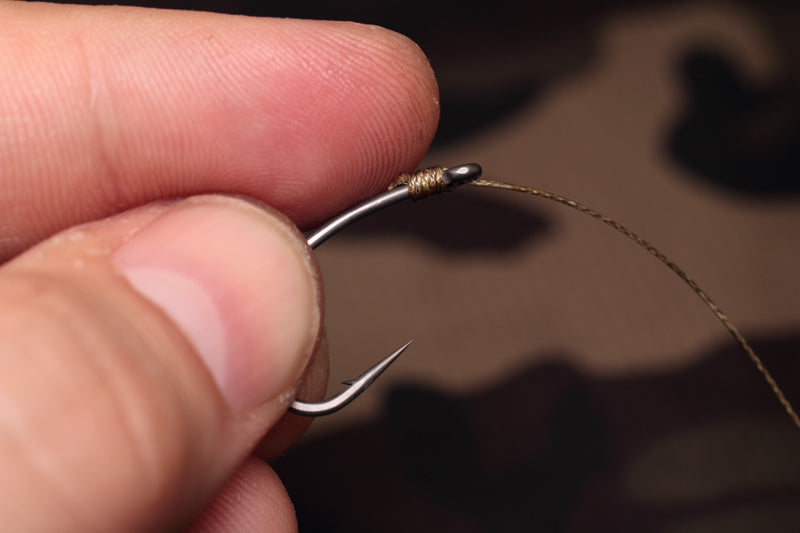
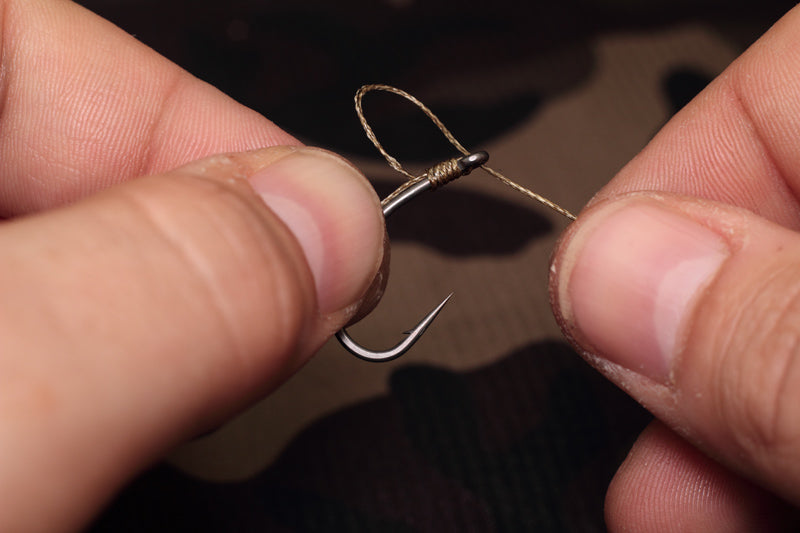
STEP FIVE: Take your line aligner and feed it onto the hook link and over the eye of the hook until it covers your knotless knot. If you're using a supple braid like we are then you will find it easier to load the aligner onto a fine baiting needle first.
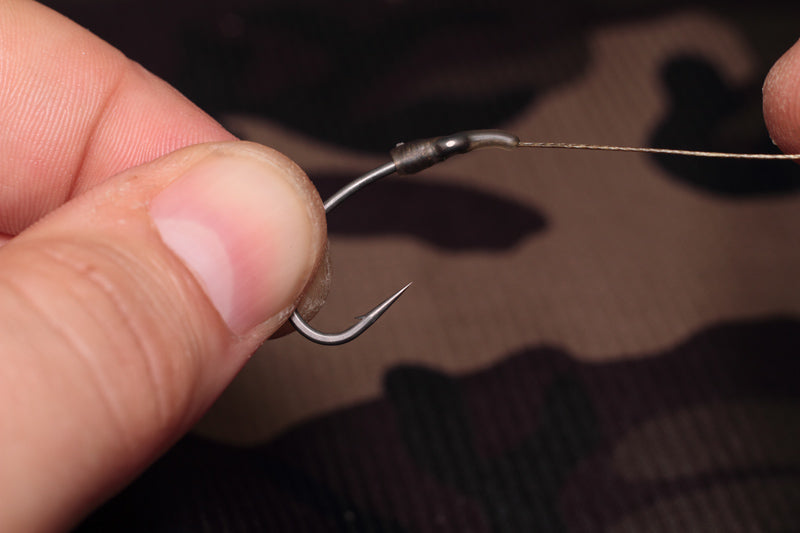
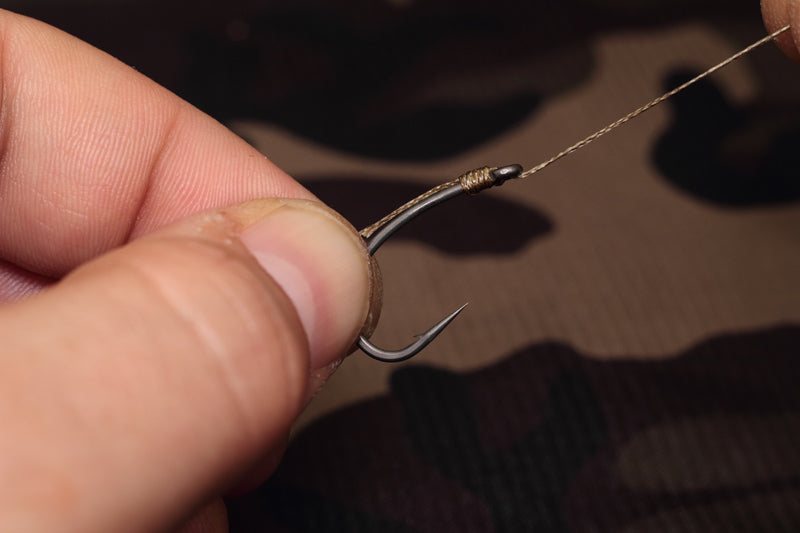
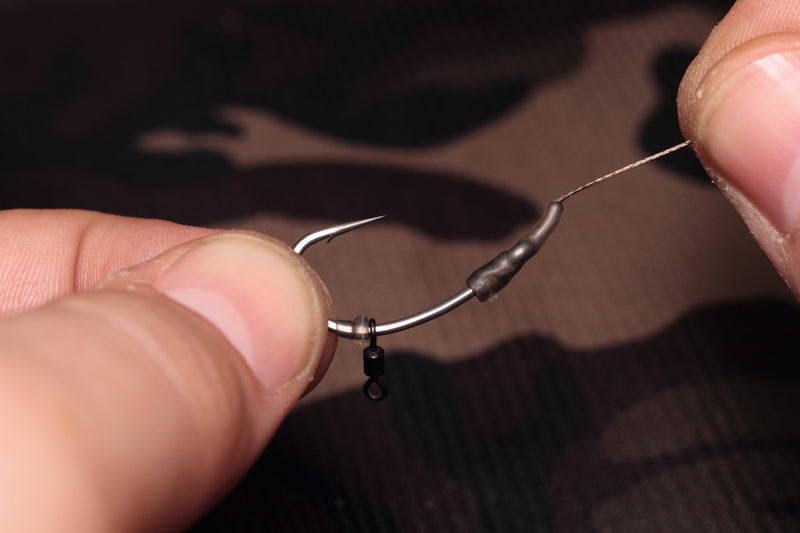
STEP SIX: Now feed one of our mini rig swivels onto the hook followed by a shank stop. We want the shank stop to be positioned about opposite the barb.
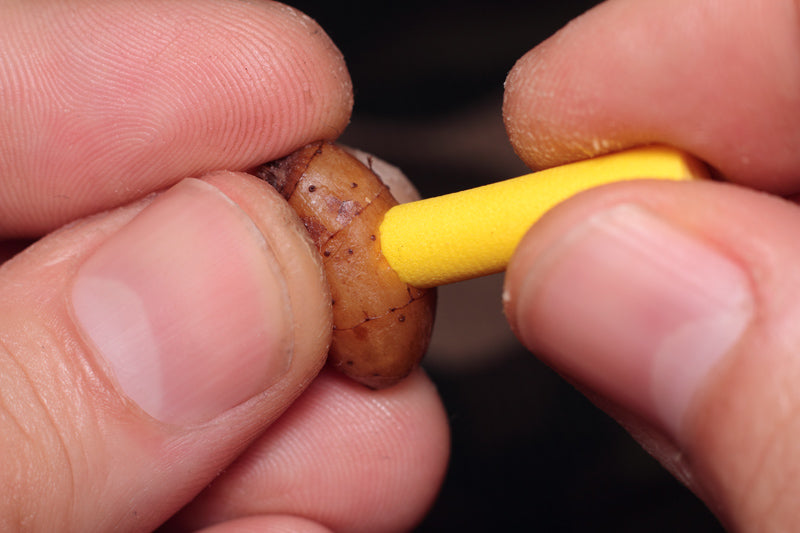
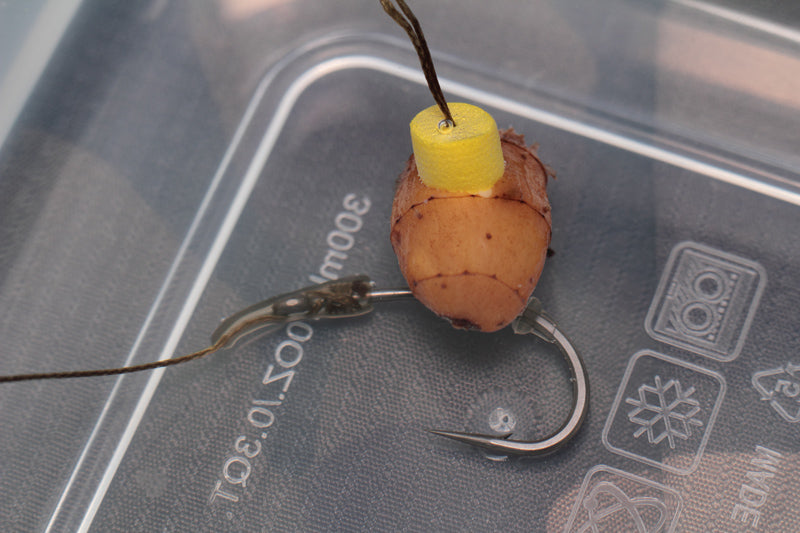
STEP SEVEN: With the rig tied it's now time to add the Tiger nut and balance it. Take your Tiger nut, a bigger one will be easier to work with. Using a 6mm bait drill bore a hole around 3 to 4mm deep.

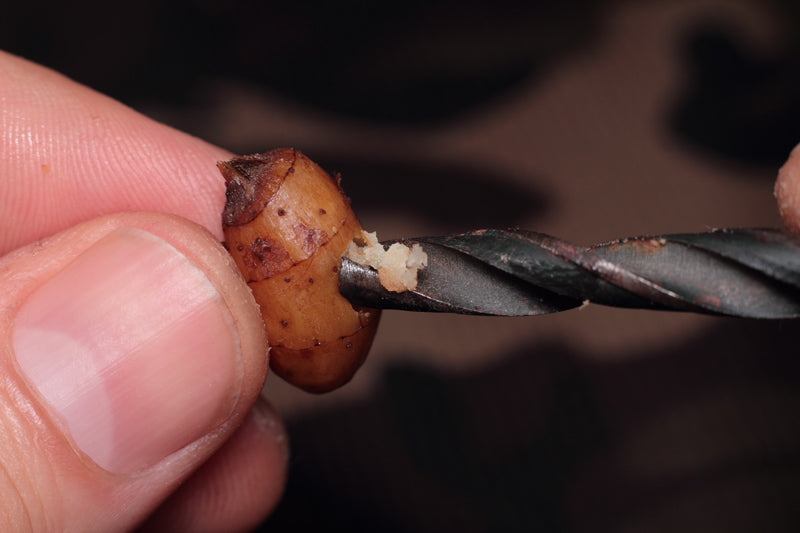
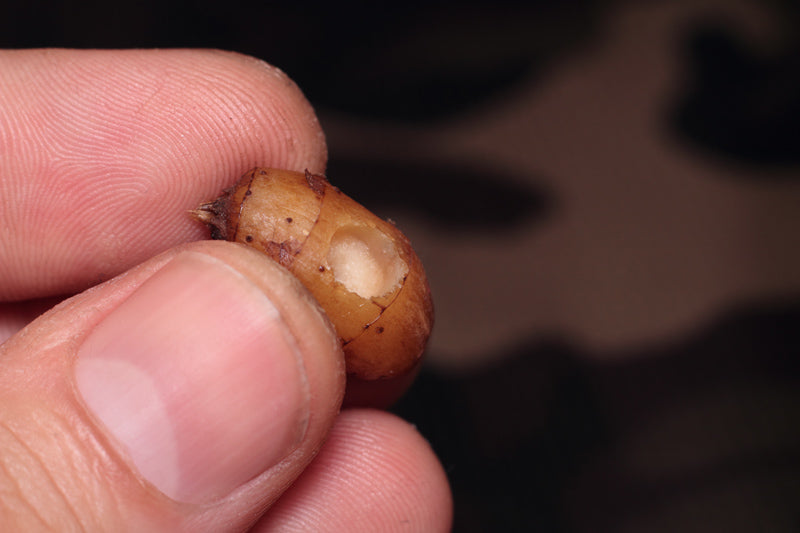
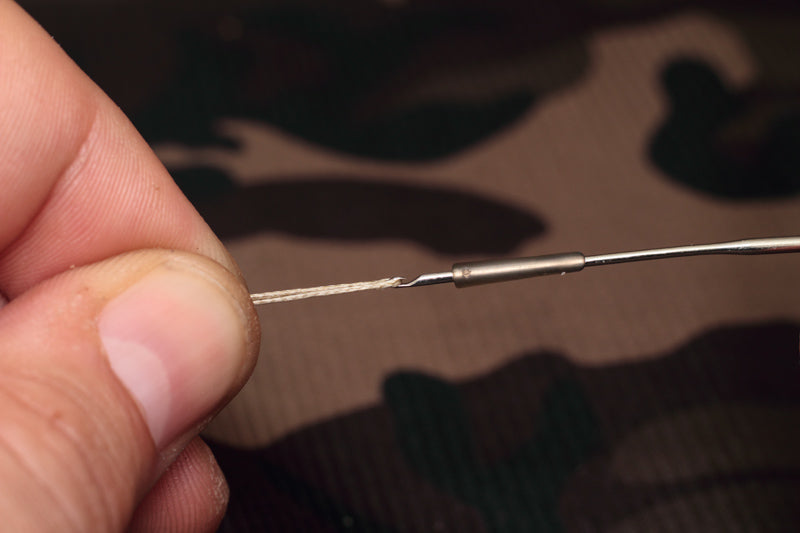
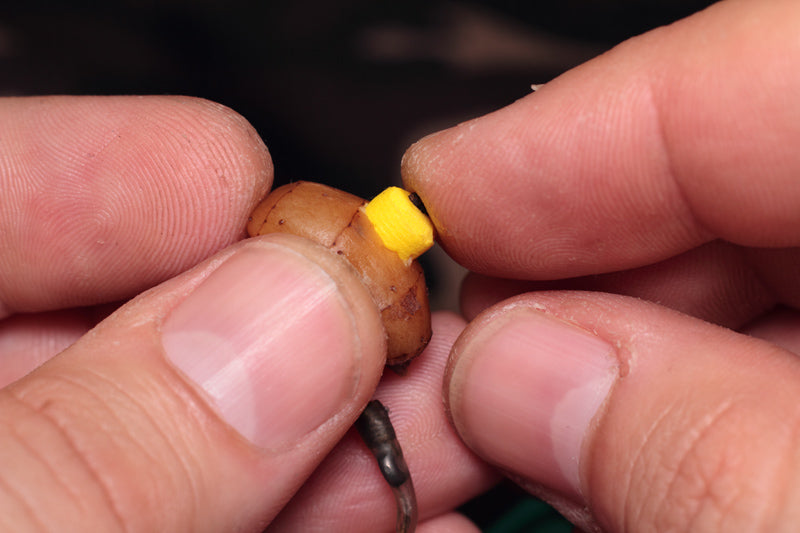
STEP EIGHT: Take a length of our 6mm STICKUMUP Zig foam and locate it in the hole you just made in tigernut. When it's located cut it but leave four or five millimetres protruding (you'll need this for balancing later).

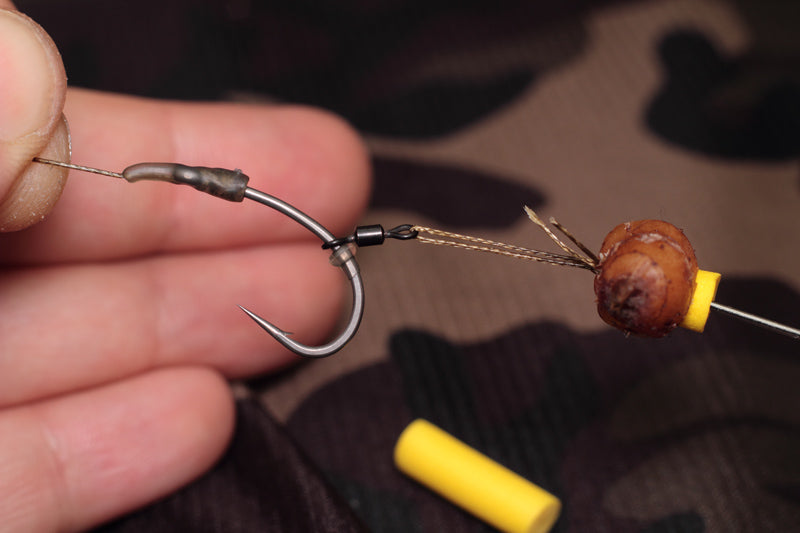
STEP NINE: Double up a length of braid/nylon or floss and position it on the mini rig swivel. Load the Tiger nut and foam onto a baiting needle and then transfer them onto the doubled over hair material. Slide the tiger nut down and locate it on the mini rig swivel. We want the body of the swivel to be inside the tiger nut. Don't trim the tag ends just yet..
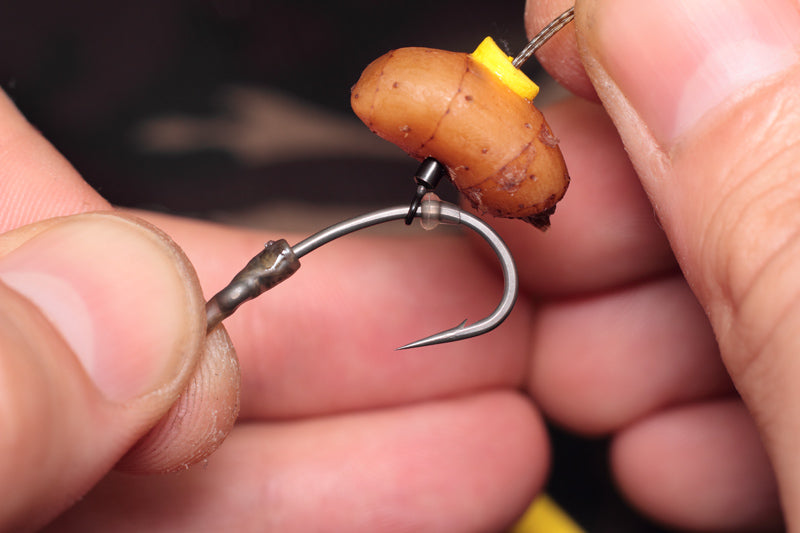
STEP TEN: Next we want to balance the rig. Using a tub of water drop your rig into it. Trim away small bits of the Zig foam until the hook and bait sink slowly. We like to trim off enough so the hook just lays on its side with the tiger nut hovering just above. It's not critically balanced but the weight of the hook is somewhat negated.
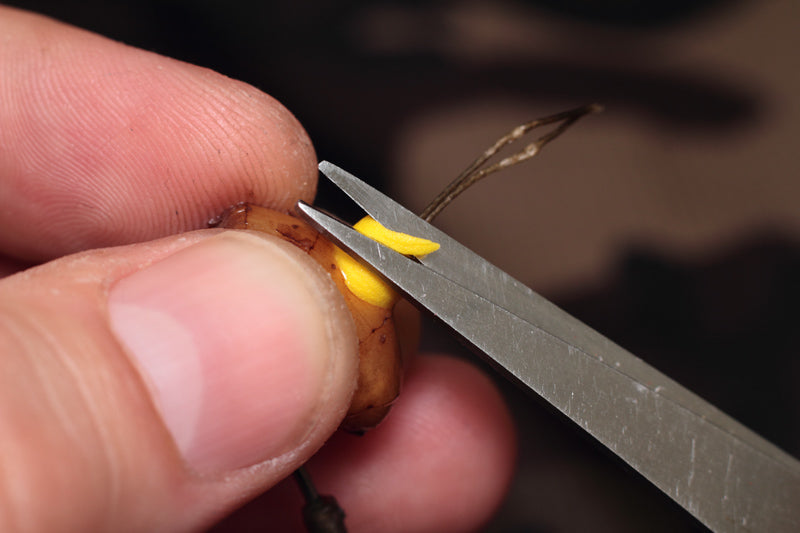
STEP ELEVEN: With rig balanced as you want it, trim down the tag ends and use your lighter to melt and blog them down against the Zig foam.

The rig is now complete, it just needs attaching the appropriate swivel for your chosen lead arrangement.
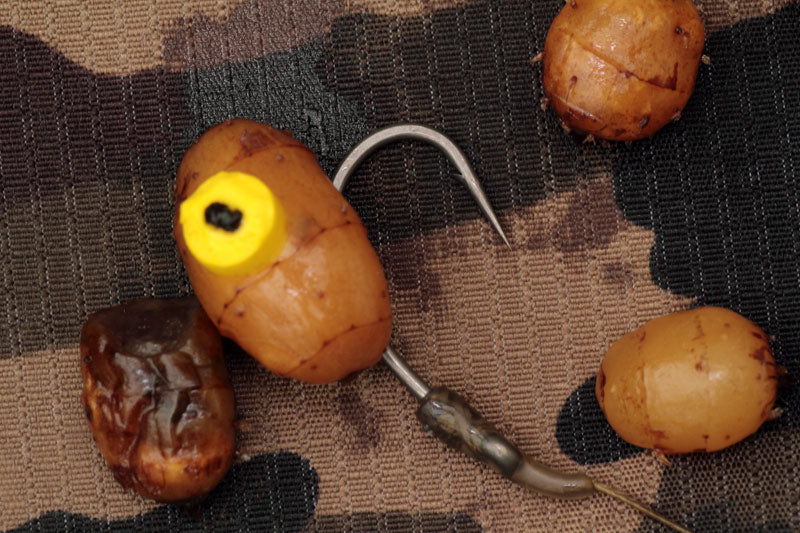

A few tiger nuts predrilled and plugged with STICKUMUP zig foam glugging in a sweet liquid.